How to set up image extensions in Google Ads?

Image extensions in the Google Ads platform are one of the most advanced types of ad extensions that allow advertisers to use rich and relevant images in their Google ads. There are no limits for adding an image in Google Ads extensions, you can add 20 numbers of images to display your ads to look more appealing. Image extensions help to drive more performance for the text ads by compelling visuals of products and services
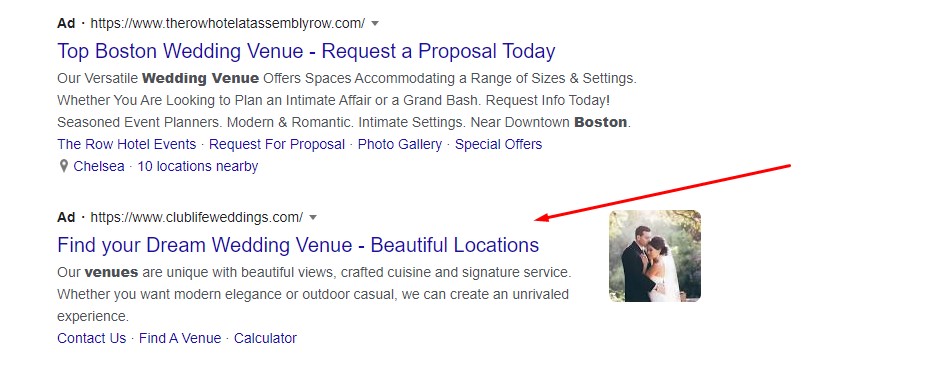
Image extensions appear on the Google search results page itself, so, your customer can see your ads now with
- Headlines
- Descriptions
- Source URL and
- Images
Requirements to add image Extension
Make sure, you should have all the below lists to add images extensions in your Google ads.
- Your Google Ads account should have a good history of policy compliance.
- Your Google Ads account should come under the eligible vertical or sub-verticals.
- Your Google Ads account must reach more than 90 days.
Guidelines to add Image Extensions
Adding an image is the best way to represent your product and services. To make your Google Ads more reachable, you can add up to 20 images with high-resolution relevant to your keywords. Image extensions must follow the guidelines to avoid disapproval from Google. For the Ad approval process, go through the Google Ads image quality checks and policy to attain the eligible criteria.
Here are the Guidelines:
- Aspect Ratio: Square (1×1) and for Landscape (1.91×1)
- File Formats: PNG, JPG, static GIF
- Image Resolution : 1200 x 1200 Pixels for Square / 1200 x 628 Pixels for Landscape images.
- Fine Size: 5120 KB
- Image copy Rights: Required
How to add image extensions: (step-by-step process)
Step 1: Create a new one or Sign in to your existing Google Ads account.
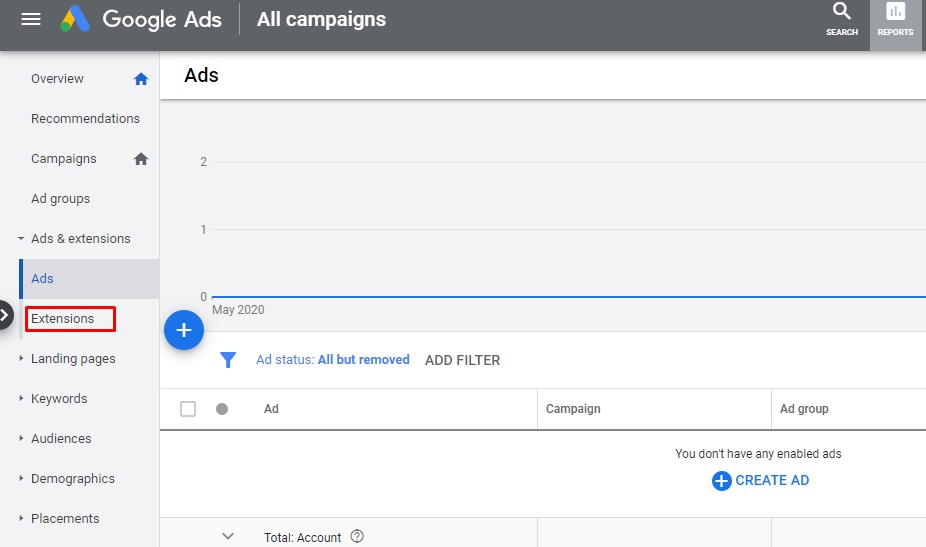
Step 2: In the left menu bar, click on the Ads &Extensions and select extension.
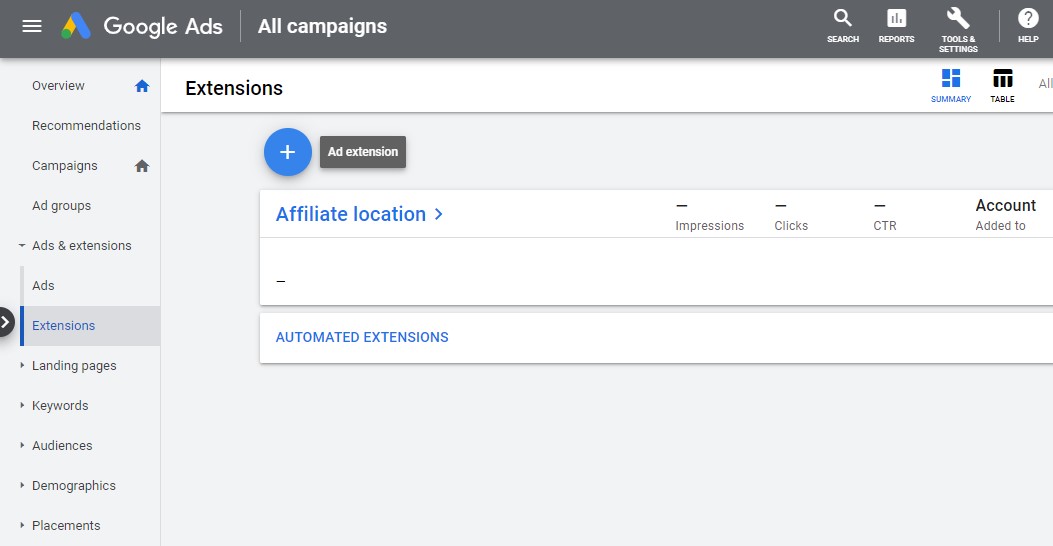
Step 3: Click the blue + button and select the Image extension.
Step 4: From the drop-down menu, select the “Add to “then select a campaign or ad group, you need to add the image extensions
If ad groups in the campaign have relevant images to promote the same product or services, then select the campaign level.
If your ad groups have different products/ services, then it is best to set the images at the ad group level.
Step 5: Click the “+” button next to the Images to select the image source from the dialog box.
Here you can add the images by selecting “ Scan Website, “ Upload”, or from Recently used”. This should be purely based on your own choice.
You can select up to 20 images for your extensions and then click the Save button.
The preview option is available on the right-side screen, you can see your image extensions in a preview window. If you want to make any changes, click the editing option.
After editing click save and runs the ad.
Key-points to remember
For the best practices, we suggest some key points to remember while setting the image extensions in your ad account.
- Avoid images overlays
- Avoid texts overlays
- Avoid using GIFs
- Avoid blurred images
- Don’t use poorly cropped images
- Avoid adding collages
- Avoid images having more blank spaces
- Avoid adding distorted images
- Don’t use Prohibited content
- Avoid uncleared and irrelevant images
Final Words:
Setting up Image extensions is not as a difficult task as you think. This is the same as other extensions but brings more impacts on your ads compare to others. Take your own time and ad only a high-quality image relevant to the keywords of the ads which you have created.
Author Profile
- Jr. SEO Consultant, Blogger, & Content Specialist. Passion for writing in SEO, Digital Marketing & Tech-related Niches.
Latest entries
 Link BuildingNovember 3, 2021Local Link Building Tactics for your Business
  Content MarketingOctober 26, 2021Top 8 Benefits of Content Marketing
 Social MediaOctober 23, 20215 Reasons Why you Need a Social Media Manager
 Content MarketingOctober 21, 2021How to Create a Winning Blog Content Strategy?


